SUSHI!!!
Yes I know, this is not a vegan dish but it is pescatarian
and very easy to substitute for your needs. You could do all veggies to make it
vegan along with vegetarian, or you could add in meats such as seafood for the
pescatarians, or steak for the meat eaters. Just about anything goes well wrapped
up as sushi.
For our sushi, we like to make coconut rice, add in an array
of vegetables, along with some “crab” meat, and special dipping sauces. Friends,
we are not made out of money and Brentwood doesn’t have a great place to go buy
seafood, so we end up buying imitation crab meat which works just fine for
us.
If you are not a fan of coconut I dare you to still try this
rice. I am NOT a fan of coconut by any means, but this stuff is amazing! It has
a very subtle sweet flavor that enhances the rice. I like it a lot more than
traditional sushi rice, which has a lot of rice vinegar in it that I find to be
a bit overpowering at times. We have found that making the rice ahead of time
works out best. This allows the rice to cool off, which makes it much easier to
spread on the nori (seaweed). If you are not a fan of seaweed like me, don’t
worry. I promise you that you won’t even notice the taste of the seaweed once
you add in all the yummy items. Don’t knock it ‘til you try it! Now let’s
begin…
What you will need to make Coconut Rice:

This makes 4-5 rolls
(we eat two rolls each)
1 cup Sushi rice which you can find at any local grocery
store
2/3 cup coconut milk
(comes in a can at any grocery store in the Asian isle)
A pinch of salt
¼ cup sugar
1 cup water
Rice cooker
How to make Coconut Rice:
Place one cup of water and one cup of sushi rice into your
rice cooker. Turn on machine and wait for rice to finish cooking.
Once your rice is cooked get a medium size pot and place
coconut milk, sugar, and salt into pot. Turn on medium heat and stir until the
sugar has melted into the coconut milk. Put rice into pot and mix until the
rice is evenly coated with your coconut milk mixture. Turn heat off and place a
lid over rice until liquid is absorbed. 1-5 minutes, this isn’t a perfect
science and don’t worry about getting this step down perfectly. It all depends
on how hot you had your heat, the type of pot, and the weather. Just shut the
heat off, put a lid on, clean your mess up and you should be ready to go. Rice
will seem wet so don’t worry, put rice into a container to the place into the
fridge to cool off. You can make this the night before or the morning of. When
you go to make your sushi rolls pull your rice out of the fridge about 10min.
before so it can become room temperature, this helps the spreading process.
What you will need to make Sushi Rolls:

Sushi mat (Got our mats for a $1.00 each at World Market.)
We
place our mats in freezer Ziplocs for easy clean up
Small bowl of water to seal roll
Flat rice spoon or spatula
Cutting board and knife to slice sushi roll
Some items will be in the Asian/Hispanic isle at your
grocery store, so be sure to check those isles.
Nori - one for each roll (Sheets of seaweed which you use to
roll up your sushi)
Sushi rice which you made a head of time
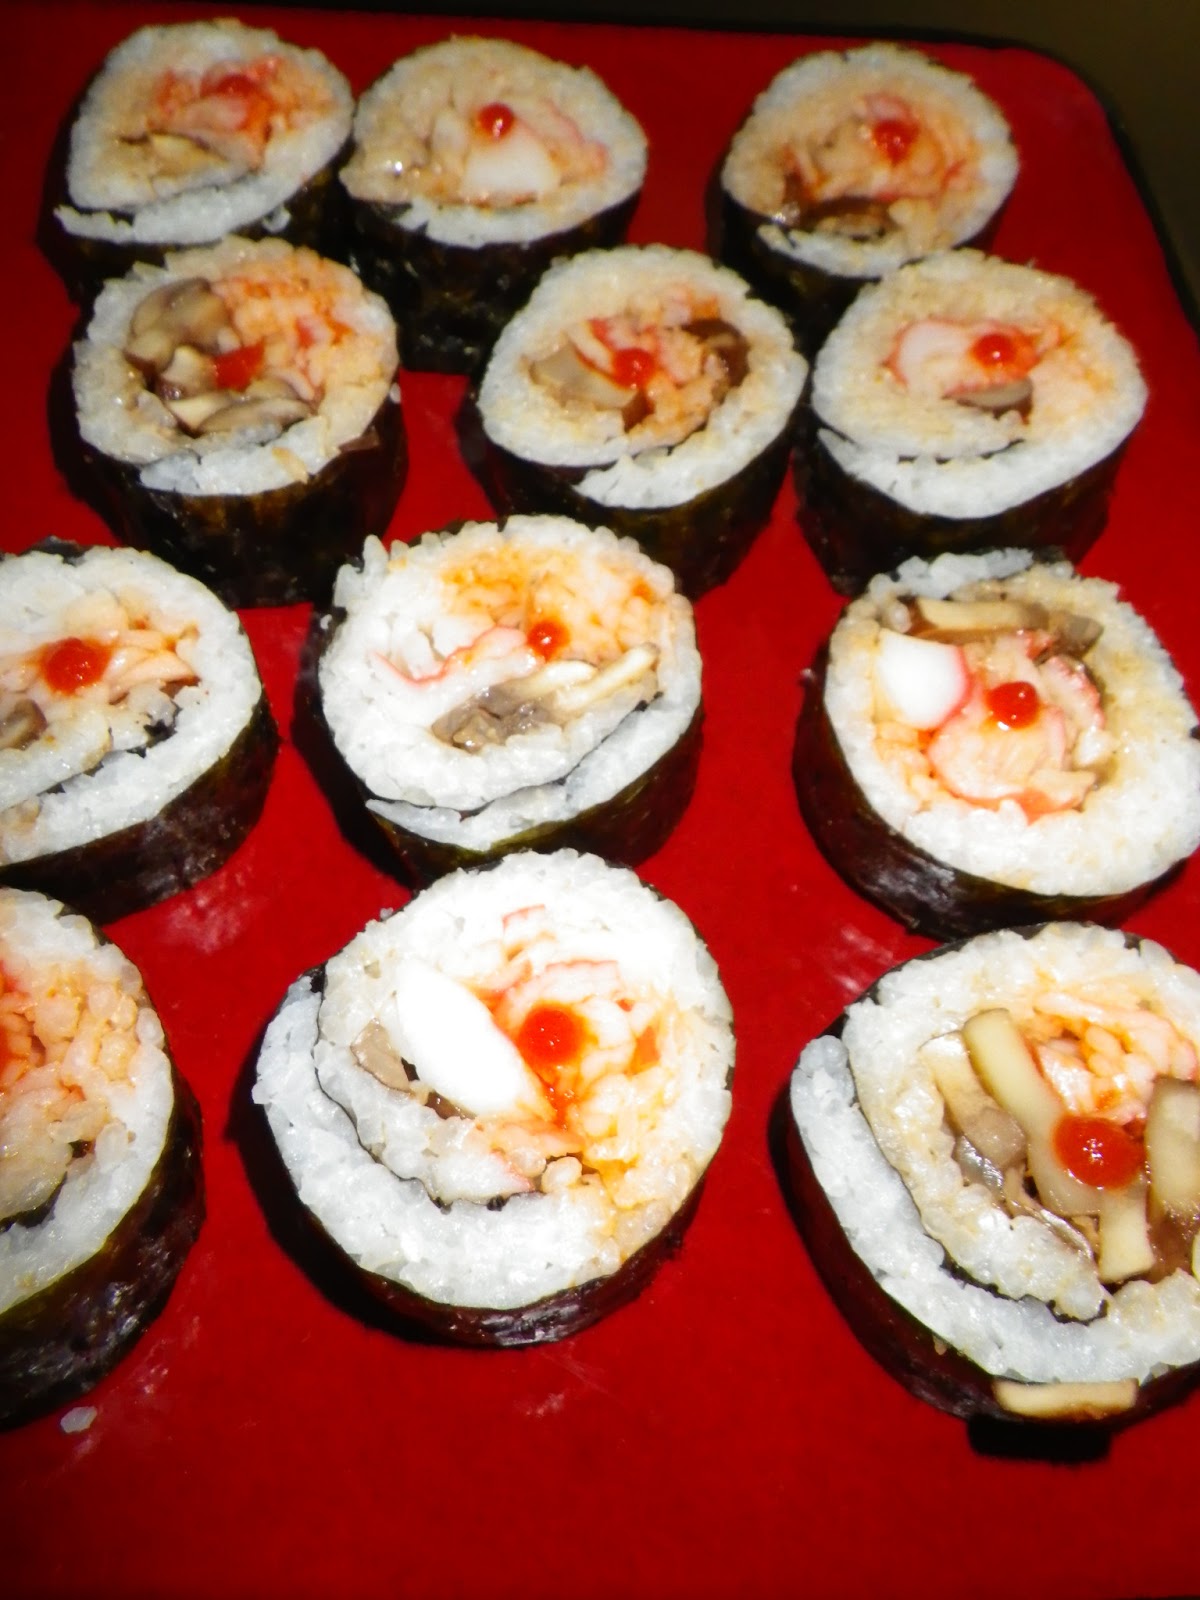
Vegetables: we use carrot, cucumber, avocado, and mushrooms
“Crab meat” you can also use shrimp or tuna, whatever you
like.
Sriracha HOT chili sauce, if you like it real spicy-just add
a drop
Sweet chili sauce, for dipping if you like it sweet and a
little spicy
(Other items you can try: cream cheese, or
mayonnaise, different kind of vegetables and meats. Remember there are no
limits when making sushi)
Tricks we have come up with after making Sushi a few times:

We sauté our mushrooms with some garlic and paprika, this is
up to you but I do suggest to sauté the mushrooms beforehand to add flavor.
Cool off mushrooms same way you do the rice.

I have horrible knife skills when it comes to cutting veggies
into real thin even slices so I cheat and use a peeler. Just cut off the ends
of the veggies you don’t want to eat and then peel the rest into thin slices.
We also mash the avocado up and use two forks to shred the crab
meat which makes rolling the sushi a lot easier.

Building your Sushi Roll:
Place your Nori paper with the shiniest side facing up at
you on your sushi mat.

Get your flat rice
spoon (we like the plastic kind over wooden), though I’m sure you can use a
spatula if you don’t have one. Take some rice and start to spread it on your
Nori.
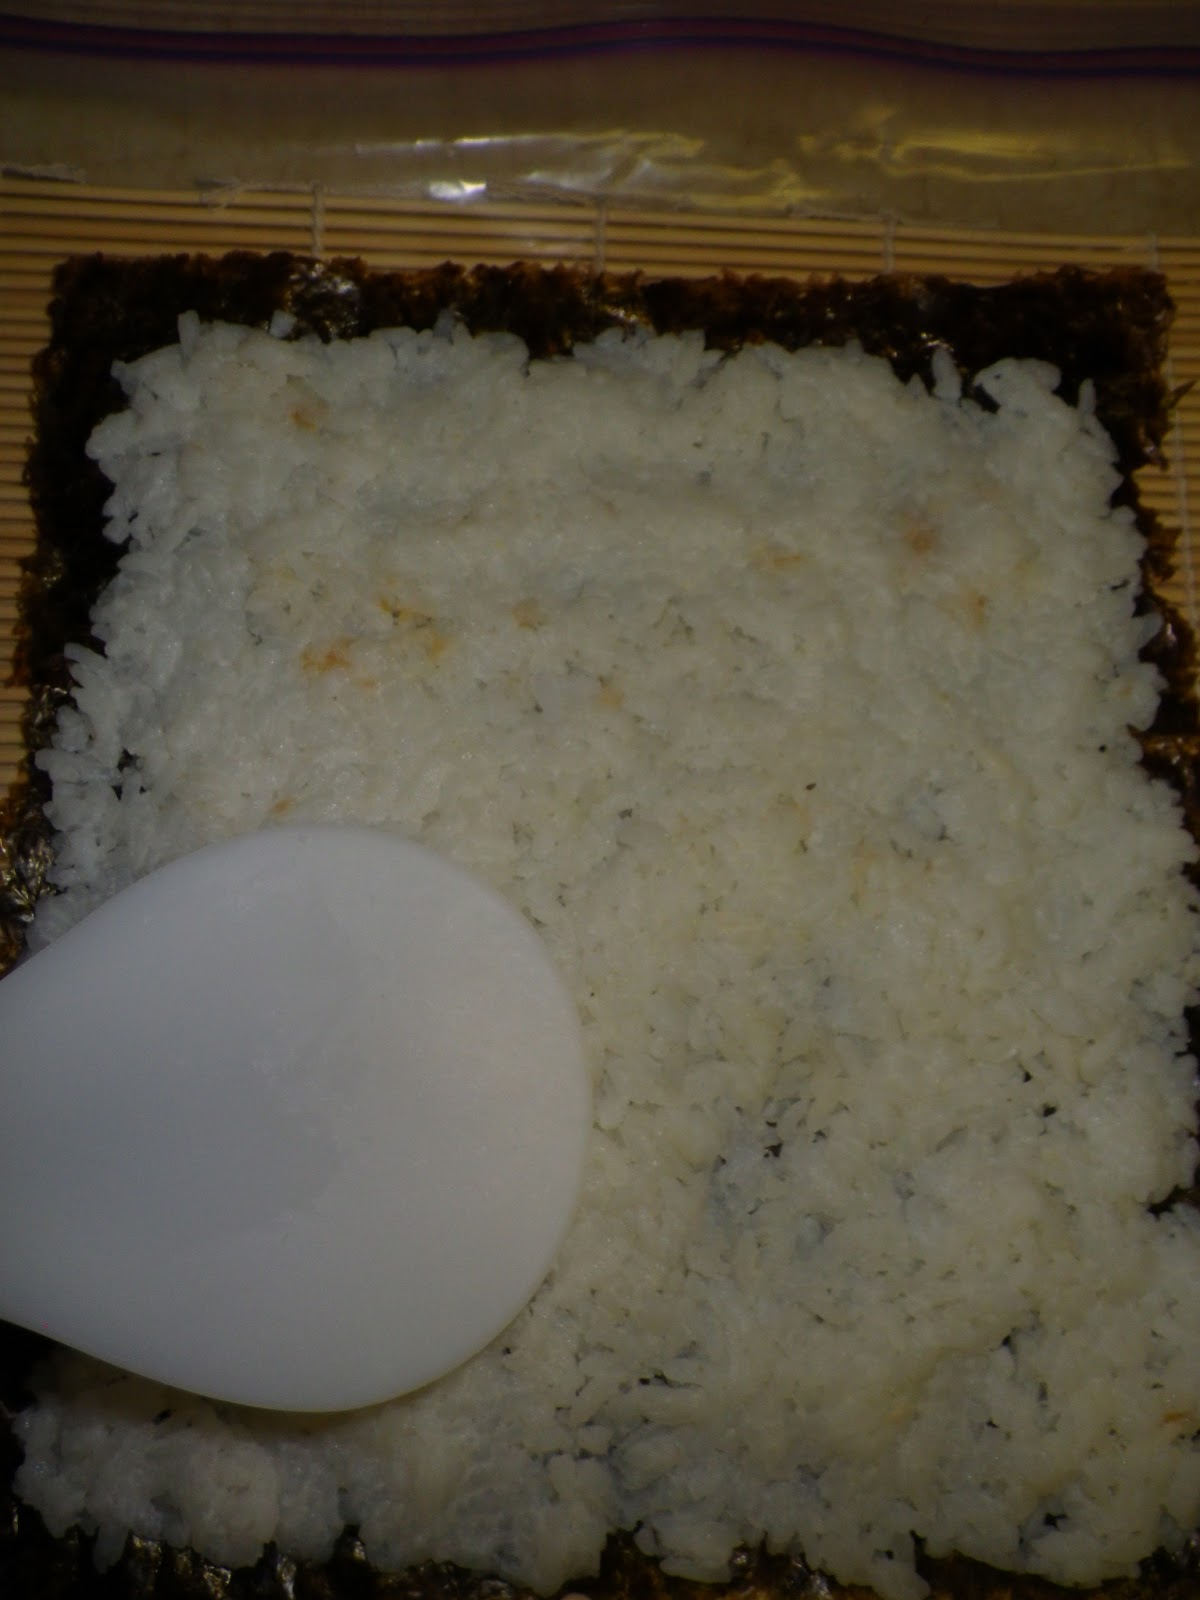
Keep a half of an inch of your Nori uncovered on the end furthest away
from you, this helps close the roll. You
will need to use a slight amount of downward pressure to basically smash the
rice while spreading along your Nori. This gets easier the more rolls you make.

Now it’s time to add your goodies, Layer them on top of one
another best you can, remember this doesn’t have to be perfect! I usually start
with spreading my avocado; if you are using cream cheese you can spread it here
too or mix your crab meat into the cream cheese or mayonnaise if you prefer. After
spreading the avocado place the thinly sliced veggies, crab meat, and mushrooms
on top. Now you are ready to roll.

Take the end of your mat closest to you and simply roll the
mat so the end of your Nori starts to roll into itself.

When rolling you can
squeeze and pull back on the mat a little to make a tighter roll, as if you are
rolling up a sleeping bag. When you pull the matt back
off your roll this is how it should look after one roll.

Now repeat until you get to the end, dip your finger into a
small bowl of water and wipe water onto the ½ inch of uncovered Nori we left
earlier when spreading the rice.

Make one final roll move and the Nori will
stick to itself, sealing where you placed the thin line of water.

Take your
roll to a cutting board and use saw like motion to gently cut your roll into
slices.

Place some dipping sauces if you like on your plate and enjoy.

This may seem overwhelming written out but it truly is very
easy. Watch a how to roll up sushi YouTube video if needed. That is how we got
started and now we make sushi once every other week or so. It’s cheap, fun, and
delicious. Enjoy my friends and get cooking!
No comments:
Post a Comment